Mitch_Z
Member
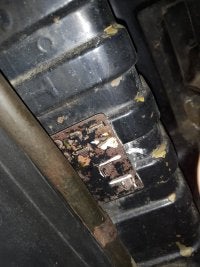
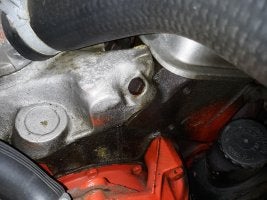
At Flint engine during hot-test they set the timing and chisel-staked the reference mark on the distributor base and intake.


I've seen that mark on a distributor and wondered how/why that got there. Interesting.At Flint engine during hot-test they set the timing and chisel-staked the reference mark on the distributor base and intake.
View attachment 185314
FWI - To apply the white highlight to Rad tags I have used a hard foam roller, made by gluing a layer of 1/8" thick foam sheet to a small hand roller both from Michaels (roll dimensions - 3" wide - ~1" diam)
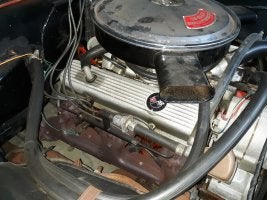
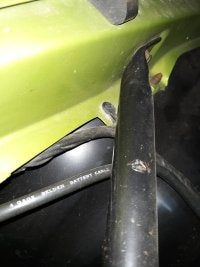
Here are some more of the engine compartment... and underhood. Let me know if you are interested - From this Car - I have a lot of paint detail shots, edges, oversprays, blackouts, anything which is out of the typical or I rarely see pictured. Also have literally 10 shots of just paint marks on the original brake rotors and as many of the spindles.
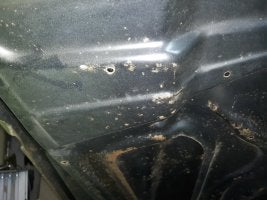
1. front hood lip showing how little paint was on the under lip...
2. Center of hood under side again lack of coverage
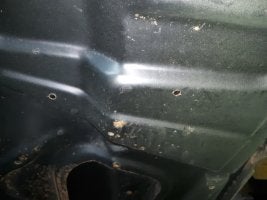
3. Rear lip under frame bulge behind the grille of hood is hand painted black with a foam brush or ?
4. better shot from pass side.
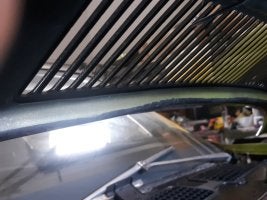
5. top of cowl where the daubed on windshield adhesive primer flowed onto the cowl top.
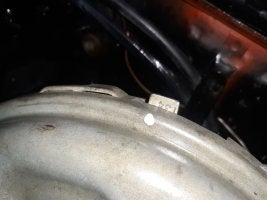
6. brake booster tab and background shows brown primer and black out.
7. another showing the light paint on the fender aprons -
This coverage pattern is due to the front clips being set up for painting on a buck with only 1-2" gap between the panels, not allowing the gun to be cocked and angled around the edges.
I am not sure if the primered upper 1-1.5" is because the angle the black out was sprayed - if you sprayed at about a 60deg angle you could achieve the under lip with the brown primer -- and be pretty consistent from one car to the next.


Wasn’t the firewall blackout an operator process (non-robotic)? I know they tried for consistency, but it seems there would be variation from car to car and even on the same car. If it was over sprayed (no brown showing) I doubt they would have tried to fix it, would they? Still, it’s good to know what the average or target is. I always wonder what the training is for new operators on things like this. Were they graded on consistency and was leaving a level of primer showing a goal? Same thing for how far under the car it goes. Thanks for the photos.I am not sure if the primered upper 1-1.5" is because the angle the black out was sprayed - if you sprayed at about a 60deg angle you could achieve the under lip with the brown primer -- and be pretty consistent from one car to the next.
Also I think that the rear of the hood area was blacked out because it may be visible from the front seats.
Does anyone else have any photos of the hood blackout application behind the hood grille area? Indicated by the RED ARROW.
You are correct. While looking at original cars is helpful the truth is that normal production cars had human consistency variations each and every time. These variations were even more pronounced when one of the assigned workers went on a break and an ARO came in to do the job as a replacement.Wasn’t the firewall blackout an operator process (non-robotic)? I know they tried for consistency, but it seems there would be variation from car to car and even on the same car. If it was over sprayed (no brown showing) I doubt they would have tried to fix it, would they? Still, it’s good to know what the average or target is. I always wonder what the training is for new operators on things like this. Were they graded on consistency and was leaving a level of primer showing a goal? Same thing for how far under the car it goes. Thanks for the photos.