Project 72 Minilu

  • Thread starter Mike E
  • Start date
  • This site may earn a commission from merchant affiliate links like Ebay, Amazon, and others.

Mike E

Veteran Member
Oct 28, 2010
226
Toledo Ohio
Hey basketcase,

So 15 years ago I bought left and right side partial quarters (didn’t use), left and right side floor pans (didn’t use) the partial trunk pan, driver side drop panel, left and right side rear inner wheel wells, the two front fenders and wheel wells and the tail panel from NPD. When I restarted the project I bought the door skins and rear lower filler panel and two piece floor pan from jegs because their shipping costs are reasonable on stuff they can ship fedex ground. I bought the quarters, new, off Facebook marketplace in Toledo and I assume they are NPD cause NPDs warehouse is close to Toledo and it wouldn’t make sense to have them shipped. So mostly NPD stuff and it’s been good so far! We shall see about the fenders and wheel wells tomorrow. Oh and bought the hood and trunk lid off marketplace too. Pretty much a repo car! Lol. Valences and top are only original exterior parts if I use the NPD fenders! Hahahaha
 

Mike E

Veteran Member
Oct 28, 2010
226
Toledo Ohio
Todays effort went into cleaning shop and organizing the parts for tomorrow. Pictures show the four fenders and four wheel wells and valences. I also ran to my favorite store! Harbor Freight and bought 16 2 dollar rollers to make up some cheap roll around things.

Tomorrow I put this front end together!
 

Attachments

  • F7A54272-06C9-4FCD-84A5-3D494C4A1B42.jpeg
    F7A54272-06C9-4FCD-84A5-3D494C4A1B42.jpeg
    216.2 KB · Views: 36
  • A15BA6A4-1601-490F-8E4C-5DB42A605A47.jpeg
    A15BA6A4-1601-490F-8E4C-5DB42A605A47.jpeg
    235.6 KB · Views: 40
  • 305D6EAD-BA7B-4ED3-988C-1A83D299F89C.jpeg
    305D6EAD-BA7B-4ED3-988C-1A83D299F89C.jpeg
    227.1 KB · Views: 38

72basketcase

Member
Jan 18, 2005
69
belton sc. USA
Thank you Mike for the detailed information on the parts, I do appreciate that. The wheel wells look great from what I can see, maybe double check the 3 bolt holes in front on the welded flat parts. I've seen a few people on here saying they had to cut those off and trim them then re-weld them back on. Not sure if it's on some or most but might be worth while to check it while you have the new and the old side by side. Maybe measure the length of the fenders too?? Some on here have mentioned one is longer than it should be but again, I don't know how common that is either, worth checking out before you go through the trouble of that particular issue. Harbor freight is a favorite for me too, good place grab a lot of things but some things I stay away from. I've picked up a lot of casters for different projects and most of them were great. Once again, thanks for the information and good luck tomorrow!!!!
 
This site may earn a commission from merchant affiliate links like Ebay, Amazon, and others.

Mike E

Veteran Member
Oct 28, 2010
226
Toledo Ohio
So before I got started on the front end sheet metal I had to hang the doors back on the car. That went pretty easy with the chain hoist. In fact it was alot easier than the last time I did it with my two sons. Adjustment was really the easy part with the hoist once you have one bolt in you can raise and lower the door with the hoist and then if you disconnect fron or back end you can raise or lower just the font or just the back.
IMG_8075.JPG


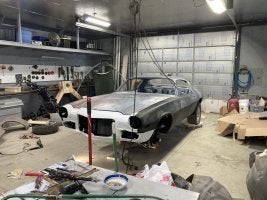
Once that was on i installed both side inner wheel wells first then each fender.
IMG_8076.JPG
IMG_8077.JPG


I installed the new NPD parts and not the originals, checked them dimensionally against the originals and they were real close, almost every dimension was right on or within an eighth of an inch. Couple things I did find though is they forgot to drill the valance mounting holes and the couple they did drill were way off. So I had to mark and drill those out, no big deal. On the passenger side the holes between the fender and lower valance were not even close, like off an inch and a half. I didn't stop the assembly to fix that yet so that's something that has to be done once I disassemble this.
IMG_8078.JPG
IMG_8079.JPG
IMG_8080.JPG


At the end of the day though I got it all together. Forgot the filler panels but I didn't take it all apart just to install them seeing I'll probably have to take this apart a half dozen times before its ready for primer.

I thought this would be assemble, prime body work and paint. Boy was I wrong! i made a quick list of all the little sheeet metal repairs that need to be done now that this is all together and its long! Probably gonna take two to three weeks to finalize this assembly. Just some of the things I now notice; the upper valance is bent on the driver side and doesn't align with the hood its also bent where it meets the fender, the hood is bent on the top driver side, the valance headlight holes need a little metal added at the edges, both doors are gonna need their edges built out cause the gap is to big. It looks like my skin job on the doors isn't completely straight and that's the culprit there. Tomorrow I'll make a list of everything that needs done. Still gotta couple days before i head out for Florida so ill try to get a few things done.

Unfortunately progress gonna slow down once I get back from Florida, cause March is tree tapping time!! If you're from North of the border you know what time that is.

Then end of March starts the Walleye run. Then April golf starts, Mid may or so house projects take first priority. Anyways I still wanna try and get this thing painted by the end of May when I know for sure progress will crawl to a halt.
 

Attachments

  • IMG_8081.JPG
    IMG_8081.JPG
    258.7 KB · Views: 43
  • IMG_8082.JPG
    IMG_8082.JPG
    248.4 KB · Views: 40
  • IMG_8083.JPG
    IMG_8083.JPG
    268.4 KB · Views: 39

72basketcase

Member
Jan 18, 2005
69
belton sc. USA
Looking good there, those repop parts appear to fit better than some of the nightmares I've seen on here. I guess it's more of a quality control issue for someone companies than others considering they're pretty much made at the same place from what I hear???
Great pictures, I'll be watching this closely! Good luck to ya!!
 

Mike E

Veteran Member
Oct 28, 2010
226
Toledo Ohio
Back from Florida yesterday.

Thought about the car, didn’t do anything on it though.

No project today, todays effort went into the evaporator! Lol.

Tapping tomorrow, start boiling on Monday! Plenty of time to work on project once the boiling starts! Work on car, load some wood, more work on car, load some more wood! Lol
 

Attachments

  • A361E41A-8A9A-4E1D-9275-4685EDF1EAE4.jpeg
    A361E41A-8A9A-4E1D-9275-4685EDF1EAE4.jpeg
    348.4 KB · Views: 34

Mike E

Veteran Member
Oct 28, 2010
226
Toledo Ohio
Syrup season is over, but now its time for the walleye run so not much happening on the car the past couple weeks.

Yesterday was way to cold to fish so I got some more time on the car and while the repo front fendors looked good from 10 feet, up close they had all kinds of issues, including: the edge at the door on both units isnt folded tight enough so it doesnt look sharp up front, I think the folded over door edge is like 1/16" radius while the repo fendors looked like 1/8 radius or more when looked at close you could see the lines wouldn't be sharp. Add to that that the top edge between the door and hood was to long would have needed to be trimed back to match. Also the edges of the fender panel where they matched up to the valance under the headlight were not folded over so that would have needed fixed. Also the fender when matched to the valance was crooked, I tried to test fit the headlight bezel on this and it was just no good. Here is a picture of this, as you can see its not straight.

IMG_8133[1].JPG


This headlight issue is the one that made me just try the old fenders back on the car and surprisingly they fell right on in place! lol
IMG_8081[1].JPG
IMG_8130[1].JPG


So after that I made the executive decision that the brand-new repo fenders would not be used.

With that, I wanted to investigate why there was Bondo on the lower passenger fender and found an old patch. Turn out someone brazed a fender corner right over a rusted out spot on the old fender.

IMG_8131[1].JPG


Decided to cut that out and patch in a new piece from the repo.

So next Ill clean up the inside fender support and decide if Im going to use that because its heavily pitted where the old fender patch was. If need be I'll cut the support from the repo and put that in too. At least the repo served some purpose! lol

But that's all gonna have to wait till the weekend, cause the walleye are in the river thick! I need to get my fishing in before Saturday, cause Saturday and Sunday at the Maumee river will be a zoo!

My final verdict on the brand new 15 year old fender repo panels is, I hope they make them better now cause those were just patch panel pieces at best. Way better to fix your originals if possible, and if you cant fix them, find some originals on marketplace or from a donor car.
 

Attachments

  • IMG_8138[1].JPG
    IMG_8138[1].JPG
    251.1 KB · Views: 24
  • IMG_8136[1].JPG
    IMG_8136[1].JPG
    236.1 KB · Views: 25

Mike E

Veteran Member
Oct 28, 2010
226
Toledo Ohio
This picture clearly shows the difference between the original and reproduction fender body lines at the door gap. The original on the left has a tight radius edge, making it a sharp line the patch from the reproduction has a rounded edge. Makes the whole edge gap look funky, not sharp. I was able to hammer this patch part flatter once attached, would have been a lot of work to hammer the whole edge. Plus a lot more bondo to smooth it all out.
 

Attachments

  • 28996C7B-81D5-454A-9D01-1B5D3ED693A2.jpeg
    28996C7B-81D5-454A-9D01-1B5D3ED693A2.jpeg
    272.4 KB · Views: 25

Mike E

Veteran Member
Oct 28, 2010
226
Toledo Ohio
No fishing today river was to low over the weekend, rained hard in ft Wayne so now river is on rise and probably going to flood stage. Fish bite is slow when river is rising, better and best when up but receding!

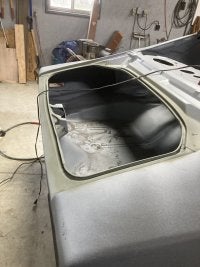
Since no fishing, worked on Camaro! Got new gutters at trunk installed. Ended up cutting the top channel from a donor piece i somehow had. Lol. Repo gutter channels require lots of manipulation, at least the ones I bought.

Today I’ll mount trunk lid.
 

Attachments

  • 734D47F9-7B8C-4081-9112-6D89C4D5D16B.jpeg
    734D47F9-7B8C-4081-9112-6D89C4D5D16B.jpeg
    216.9 KB · Views: 24
  • 3635D0E6-98D3-42AE-8130-68C533992506.jpeg
    3635D0E6-98D3-42AE-8130-68C533992506.jpeg
    204.5 KB · Views: 24
  • 02210F7E-11B9-47C8-8E5B-6405076F8FF4.jpeg
    02210F7E-11B9-47C8-8E5B-6405076F8FF4.jpeg
    198.5 KB · Views: 25
  • 48334830-A1F1-4125-A920-FB955E83DA54.jpeg
    48334830-A1F1-4125-A920-FB955E83DA54.jpeg
    200.1 KB · Views: 25
Top